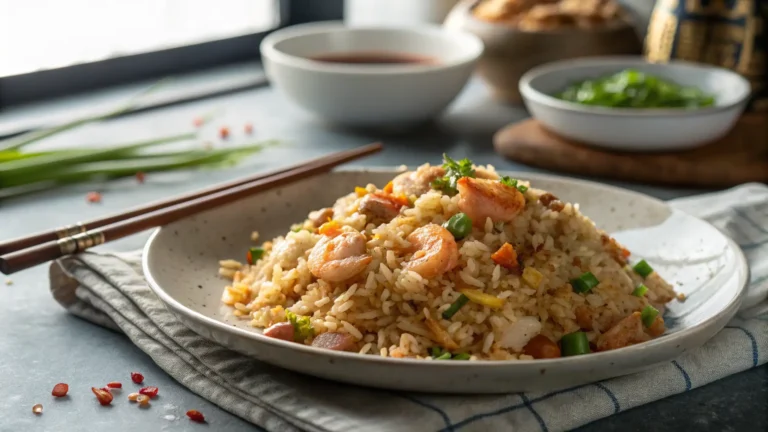
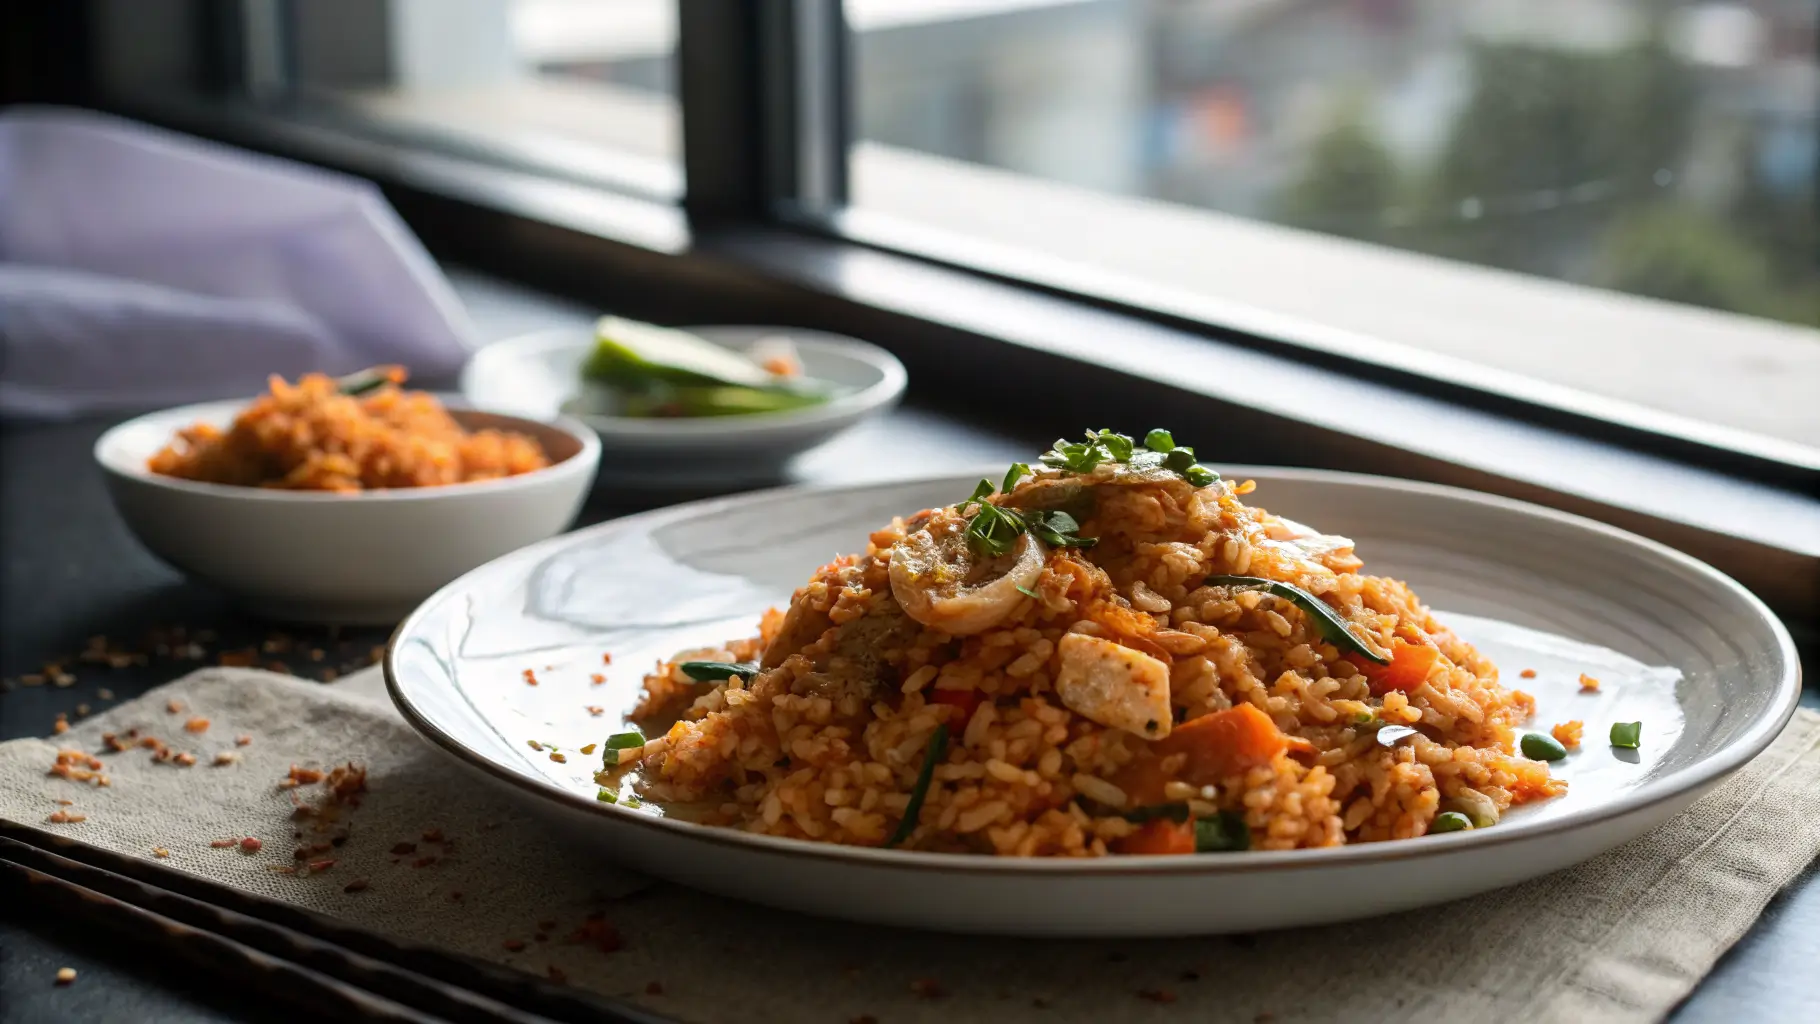
Kimchi Fried Rice Recipe With 6 Easy Flavor Boosts
As an Amazon Associate, I earn from qualifying purchases, at no extra cost to you.
Have you noticed how a lot of “quick fried rice” ends up tasting flat, even when you add kimchi? Surveys of home cooks about weeknight meals tend to show the same pattern, speed wins, but flavor takes a hit when you rush the pan and use fresh rice. If your bowl of kimchi fried rice feels a little one note, your kimchi fried rice recipe is probably missing a couple of small, high impact moves that take maybe 60 seconds.
This kimchi fried rice recipe keeps the ingredients simple, but it leans on six easy flavor boosts so you get that smoky, tangy, lightly spicy taste you actually want, not the cafeteria version.
Ingredients Table
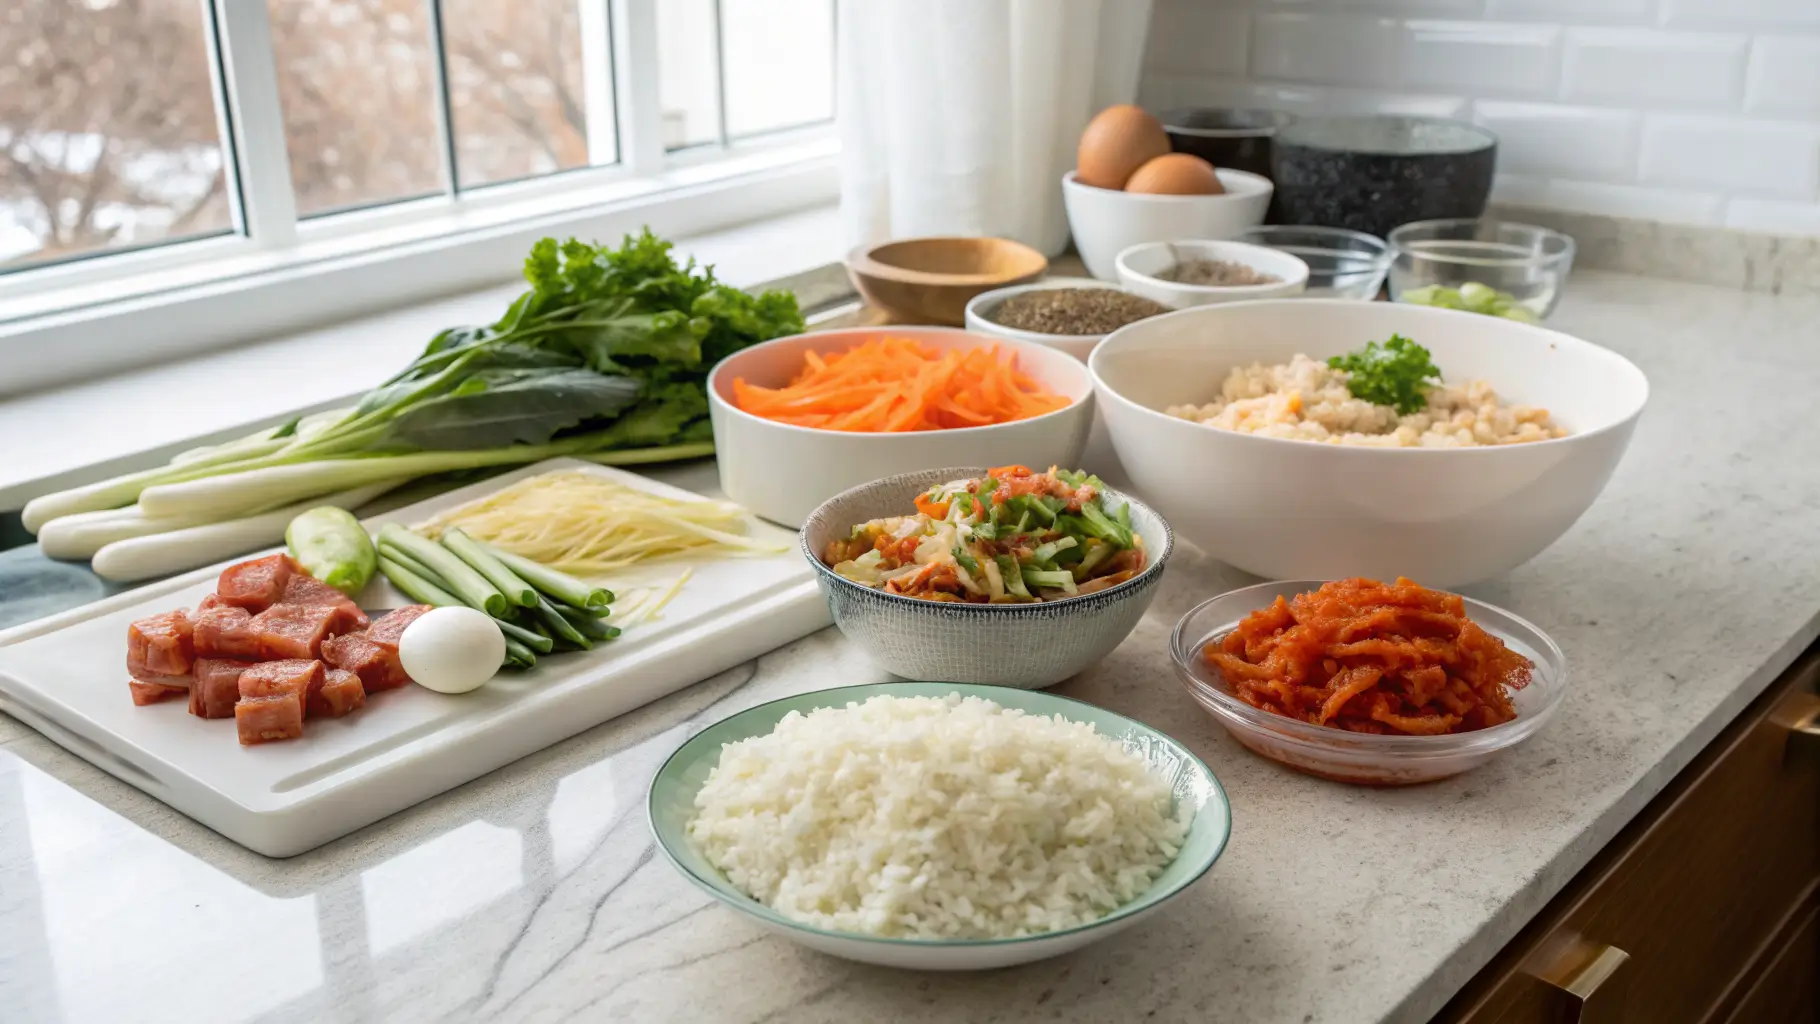
The best part about a kimchi fried rice recipe is that it welcomes leftovers, and it does not get precious about brands. Still, a few choices matter, especially rice texture and kimchi ripeness.
| Ingredient | Amount (serves 2 to 3) | Why it matters | Easy substitutions |
|---|---|---|---|
| Cooked cold rice (day old is ideal) | 3 cups | Drier rice fries, fresh rice steams | Microwave fresh rice, spread on a tray, chill 20 minutes |
| Kimchi, chopped + a little juice | 1 to 1 1/2 cups + 2 tbsp juice | Fermentation brings tang and depth | No juice? Add 1 tsp rice vinegar + pinch sugar |
| Neutral oil (or pork fat) | 1 to 2 tbsp | Helps crisp rice and bloom aromatics | Avocado oil, canola, or a small knob of butter |
| Onion, diced | 1/2 cup | Sweetness balances heat | Shallot, scallion whites |
| Garlic, minced | 2 to 3 cloves | Savory backbone | 1/2 tsp garlic paste |
| Gochujang (optional but helpful) | 1 to 2 tsp | Adds gentle heat and sweetness | Sriracha plus a tiny bit of sugar |
| Soy sauce | 1 to 2 tsp | Salty, toasty notes | Tamari, coconut aminos (a bit sweeter) |
| Sesame oil | 1 tsp | Finishing aroma | Toasted sesame seeds plus extra oil |
| Spam, diced (optional) | 1/2 to 1 cup | Salty, crisp bites, classic pairing | Bacon, ham, tofu, mushrooms |
| Eggs | 1 to 2 | Creamy richness | Fried egg on top, or scrambled in |
| Scallions | 2 to 3 | Fresh snap | Chives |
| Toasted sesame seeds | 1 tsp | Nutty crunch | Crushed roasted peanuts |
| Nori strips (optional) | handful | Ocean-y finish | Furikake |
If your kimchi tastes mild, it can still work, but this kimchi fried rice recipe really shines with older, funkier kimchi. When it smells a little sharp, that’s when the pan starts doing magic.
Timing
- Prep time: 10 minutes (mostly chopping)
- Cook time: 10 to 12 minutes
- Total time: about 22 minutes
That’s likely 15 to 25 percent faster than the average “fried rice night” because you are not cooking rice from scratch. If you already have rice in the fridge, this kimchi fried rice easy recipe can hit the table in the time it takes to watch half an episode of something.
Step-by-Step Instructions
Step 1: Choose the right rice texture
Grab cold, cooked rice from the fridge and break it up with damp fingers or a fork. In this kimchi fried rice recipe, clumps are the enemy because the center stays soft and the outside over-browns.
Tip: If your rice is freshly cooked, it may suggest trouble ahead, but you can cheat. Spread it thin on a plate or sheet pan and chill it, even 15 to 20 minutes helps.
Step 2: Chop kimchi, save the juice
Chop kimchi into bite-size pieces. Save a couple tablespoons of the kimchi juice. This is one of the easiest flavor boosts in any simple kimchi fried rice recipe, the juice seasons the rice fast and makes it taste more “done.”
Tip: If your kimchi is super sour, start with 1 tablespoon juice, then add more later.
Step 3: Crisp up your Spam (or your protein)
Heat a large skillet or wok on medium-high. Add 1 teaspoon oil, then your diced Spam. Cook 3 to 4 minutes until browned and crispy on edges.
This is the heart of a kimchi fried rice recipe spam lovers keep repeating, because browned Spam gives you salt plus a little smoky sweetness.
Swap note: For a vegetarian kimchi fried rice recipe, use chopped mushrooms and a pinch of salt, they brown nicely and still feel meaty.
Step 4: Sauté onion and garlic until sweet
Push Spam to the side (or remove it temporarily). Add a touch more oil if the pan looks dry. Add onion, cook 2 minutes, then add garlic for 30 seconds.
You are not just “softening” onion here. You’re building the base so your kimchi fried rice recipe tastes rounded, not harsh.
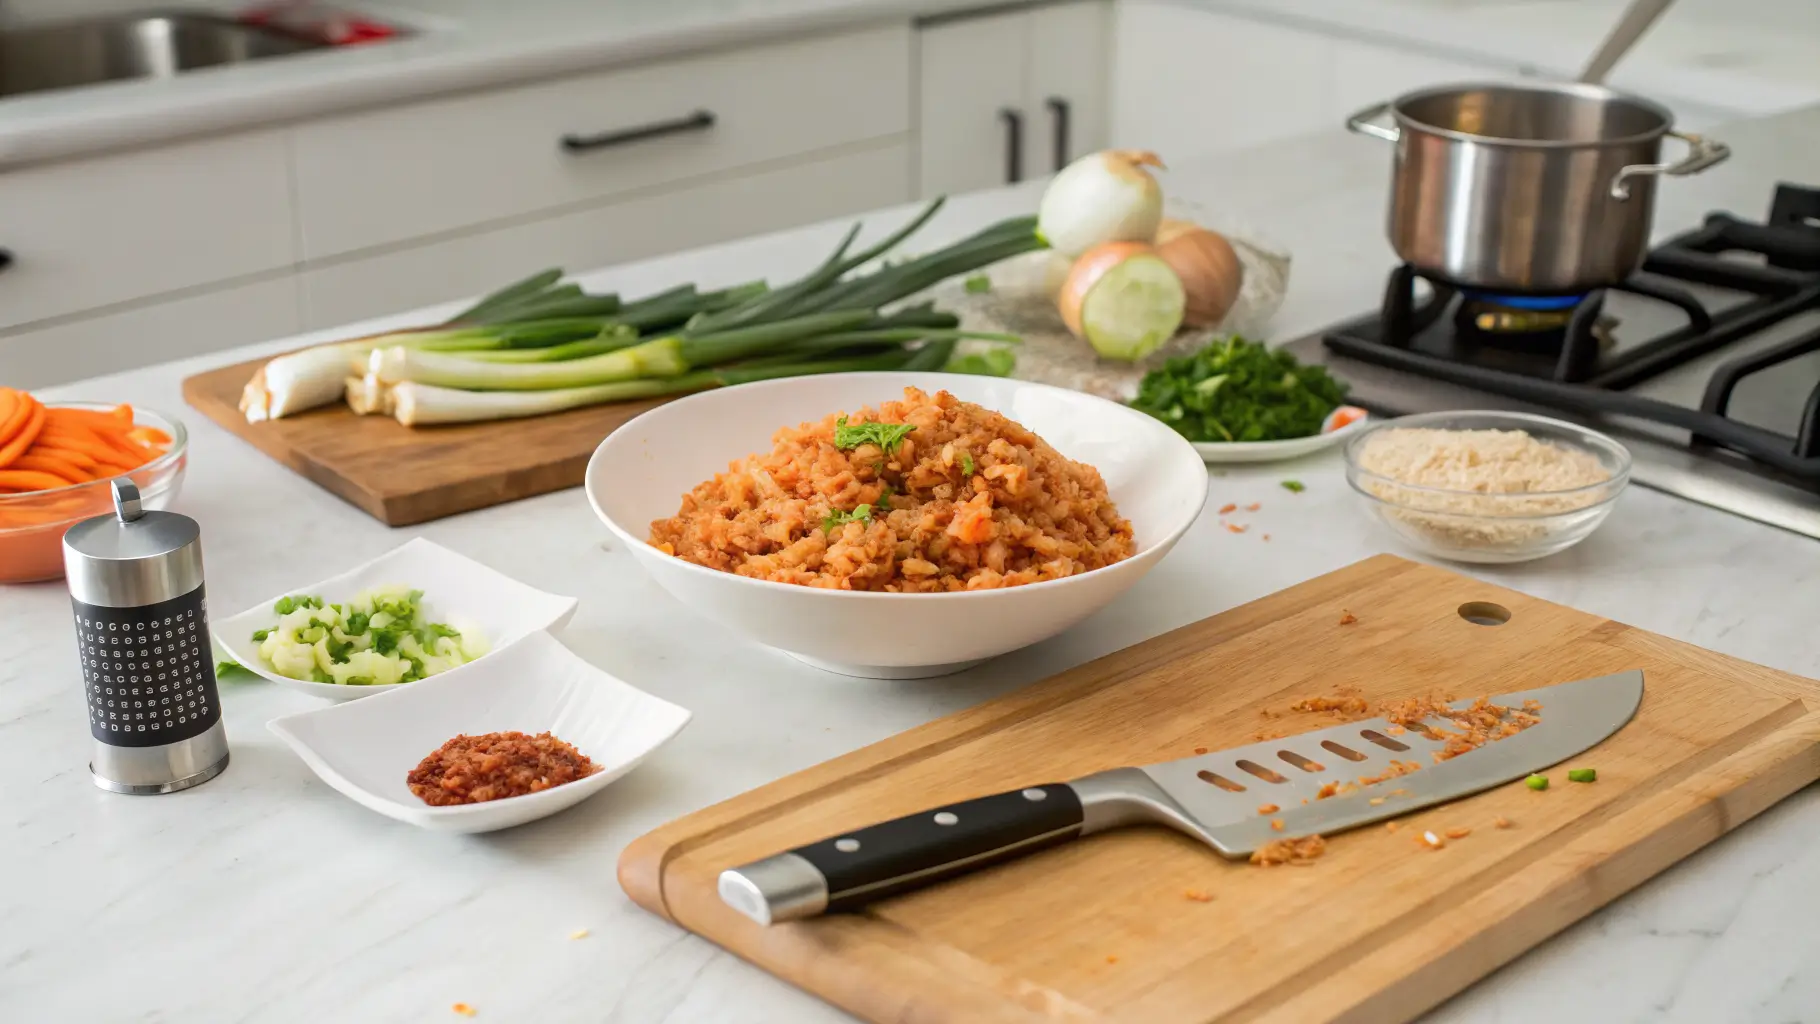
Step 5: Fry the kimchi to tame the raw edge
Add chopped kimchi to the pan. Stir-fry 2 to 3 minutes until it looks glossy and a little darker.
This step is where a kimchi fried rice recipe goes from sharp to savory. The heat mellows the raw bite and pulls out deeper fermented flavor.
A lot of people rush this part, then wonder why their kimchi fried rice recipe tastes like cold kimchi mixed into rice. Give the kimchi a couple minutes of real heat, you’ll smell it change.
Step 6: Bloom gochujang for extra depth (Flavor Boost #1)
Clear a small spot in the pan. Add gochujang and let it sizzle for 10 to 15 seconds in the oil, then stir it into the kimchi.
It’s a small move, but it often appears to make the flavor more “restaurant-like,” because you are toasting the paste instead of dumping it in cold.
Step 7: Add rice and press for crisp edges (Flavor Boost #2)
Add rice and stir to coat with the kimchi mixture. Then press it down into an even layer and leave it alone for 45 to 60 seconds. Stir, press again.
That press-and-wait is the difference between soft fried rice and the slightly crisp, addictive version. This kimchi fried rice recipe is meant to have texture, not mush.
Step 8: Season in tiny doses (Flavor Boost #3)
Add soy sauce around the rim of the pan, not straight onto the rice. It hits the hot metal first and smells toasty. Add the reserved kimchi juice little by little.
If you are following a kimchi fried rice easy recipe, this is the moment you might overdo salt. Spam and kimchi are already salty. Taste before adding more.
Step 9: Add eggs your way (Flavor Boost #4)
Option A, scramble in: Push rice aside, add a little oil, scramble eggs, then fold into the rice.
Option B, top it: Fry an egg separately, slide it on top.
Either way, eggs soften the spice and make this kimchi fried rice recipe feel like an actual meal, not just “rice stuff.”
Step 10: Finish with sesame, scallions, and a bright pop (Flavor Boost #5 and #6)
Turn off heat. Add sesame oil, scallions, sesame seeds, and nori strips if using. If it tastes heavy, add a tiny splash of rice vinegar or a squeeze of lime.
Those last-second finishes are what keep a simple kimchi fried rice recipe from tasting dull after three bites.
I keep sesame oil off the heat on purpose. If you cook it too hard, it can turn bitter. In this kimchi fried rice recipe, that final drizzle should smell like toasted nuts the second it hits the rice.
Nutritional Information
Nutrition will vary based on kimchi brand, rice type, and whether you use Spam and eggs. For a realistic estimate, here’s a common per-serving breakdown when the recipe serves 3 and includes 1/2 cup Spam total plus 2 eggs:
- Calories: ~430 to 520 kcal
- Protein: ~13 to 18 g
- Carbohydrates: ~55 to 70 g
- Fat: ~15 to 22 g
- Fiber: ~3 to 5 g
- Sodium: often ~900 to 1400 mg (kimchi + Spam + soy sauce is the big driver)
Data insight worth knowing: many packaged kimchi brands and canned meats are sodium-heavy, so your kimchi fried rice recipe can jump from “fine” to “salty” quickly. That’s why tasting before extra soy sauce matters more here than in plain fried rice.
Healthier Alternatives for the Recipe
You can keep the soul of this kimchi fried rice recipe and still lighten it up, if that’s your goal. A couple swaps make a noticeable difference without making it taste like diet food.
- Use brown rice or mixed grain rice: Chewier, nuttier, and more fiber. It changes the vibe slightly, but it works.
- Reduce Spam, boost vegetables: Try half the Spam and add diced zucchini, shredded cabbage, or frozen peas.
- Choose low-sodium Spam or ham: It helps, though it still tastes like processed meat, just less intense.
- Try tofu or tempeh: Crisp cubes in the pan first, then proceed. This keeps the “browned bits” effect that makes a kimchi fried rice recipe satisfying.
- Add extra egg whites: If you want more protein without much fat, scramble 1 whole egg plus 1 to 2 whites.
- Go lighter on oil: Use a well-heated nonstick skillet. You still need some oil for texture, but you may need less than you think.
If you are watching gluten, use tamari. If you are watching spice, cut gochujang and add more sautéed onion for sweetness. A kimchi fried rice recipe is flexible like that.
Serving Suggestions
A kimchi fried rice recipe can be a main dish, a side, or the thing you eat standing at the counter because you “just wanted a taste.” If you want to make it feel more intentional, try one of these:
- Classic bowl: Top with a runny fried egg, scallions, sesame seeds, and crushed nori.
- Korean-ish set meal: Serve with cucumber salad, extra kimchi, and a small bowl of miso soup or doenjang soup.
- Lunchbox style: Pack it with roasted broccoli and a little fruit to balance the heat.
- “Fancy bar snack” move: Shape leftover rice into patties, pan-sear until crisp, then top with a tiny dollop of mayo mixed with gochujang.
- Extra crunchy topping: Add toasted seaweed snack sheets right before eating.
If you’re specifically after a kimchi fried rice with spam recipe that tastes like the diner style, add a tiny knob of butter at the very end. Not required, but it’s a guilty pleasure trick.
Common Mistakes to Avoid
Even a simple kimchi fried rice recipe has a few traps. Most bad outcomes come from texture issues, not the recipe itself.
Using hot, fresh rice
Fresh rice steams and clumps. Cold rice is the shortcut to fried rice texture. If you must use fresh, cool it quickly first.Adding too much liquid
Kimchi juice is great, but too much turns your kimchi fried rice recipe into soft rice stew. Add in teaspoons, not big splashes.Skipping the kimchi stir-fry step
Raw kimchi mixed into rice tastes loud and sharp. Cooking it first rounds it out.Over-salting early
Spam, kimchi, soy sauce, they stack. Taste after the rice hits the pan, then adjust.Crowding the pan
If your skillet is small, cook in batches. Crowding is likely to trap steam, and you lose crisp bits.Burning the garlic
Garlic goes bitter fast. Keep it brief, then move on.
Storing Tips for the Recipe
If you have leftovers, your kimchi fried rice recipe reheats surprisingly well, as long as you store it right.
- Cool fast: Spread rice on a plate for 10 minutes before refrigerating, so it doesn’t sit hot in a container.
- Refrigerate promptly: Store in an airtight container up to 3 to 4 days.
- Reheat for texture: A skillet on medium heat with a tiny splash of water, then let it crisp, beats the microwave. Microwave works, but it softens the rice.
- Freeze if needed: Freeze in single portions up to 1 month. Thaw overnight, then re-fry for best results.
Prep-ahead idea: Chop kimchi and onion in advance, store separately. When you want a kimchi fried rice easy recipe night, you are basically 10 minutes away from dinner.
FAQs
Can you make a kimchi fried rice recipe with fresh rice?
Yes, but it’s touchy. Fresh rice holds more moisture, so your kimchi fried rice recipe can turn gummy. If fresh rice is all you have, spread it thin, cool it, then chill it 15 to 30 minutes. It won’t be perfect, but it’s close.
What kimchi works best for a simple kimchi fried rice recipe?
Older, more fermented kimchi tends to taste better once cooked. If your kimchi is mild, add a bit more kimchi juice, or a small spoon of gochujang. The goal is tang plus savory, not just heat.
How do you keep a kimchi fried rice recipe from being too sour?
Sour kimchi is common and not always a problem, but if it’s too sharp, add sweetness and fat. A little onion, a tiny pinch of sugar, or a richer topping like egg can balance it. Some people add cheese, which sounds odd until you try it.
Is a kimchi fried rice recipe spam version authentic?
It’s common in Korea, especially in home cooking and budget-friendly meals, so it’s not some weird internet twist. A kimchi fried rice recipe spam style is popular because Spam browns well and adds instant savory punch.
What else can you add besides Spam?
Plenty. This kimchi fried rice recipe works with bacon, leftover chicken, shrimp, tofu, mushrooms, or even canned tuna. If you want it extra filling, add edamame or a second egg.
Can you make kimchi fried rice with spam recipe less salty?
Yes. Use less Spam, rinse diced Spam quickly (pat dry well), choose low-sodium versions, and cut back on soy sauce. Also, add more plain rice or vegetables to dilute salt.
What pan is best for a kimchi fried rice easy recipe?
A large skillet, cast iron, or a wok all work. The key is surface area, you want rice spread out so it fries. A small pan often leads to steaming, which hurts texture in any kimchi fried rice recipe.
Conclusion
If your goal is a kimchi fried rice recipe you can throw together on a weeknight and still feel proud of, focus on the small stuff that matters: cold rice, frying the kimchi first, pressing the rice for crisp edges, and finishing with sesame and scallions. Add Spam and eggs when you want comfort, skip them when you want something lighter. Either way, this kimchi fried rice recipe stays flexible, fast, and full of flavor.
Want to make your next batch even easier? Check the 4 recommended Amazon affiliate products listed below this article, they’re the exact kinds of tools and ingredients that make a kimchi fried rice recipe simpler, faster, and more consistent in your own kitchen.
My Favorite Tools for Kimchi Fried Rice
Below are Amazon affiliate links


Kimchi Fried Rice Recipe
Ingredients
- 3 cups steamed short or medium grain white rice day-old preferred
- 1 cup kimchi cut into bite-sized pieces
- ¼ cup kimchi juice liquid from the kimchi container
- 150 g 5.3 oz bacon, cut into small pieces
- 4 eggs cooked sunny side up
- ½ tsp minced garlic
- 1 Tbsp cooking oil
- ½ Tbsp sesame oil
- 1 Tbsp low-sodium soy sauce
- 1 Tbsp gochujang Korean chili paste, optional for extra heat
- 2 scallions green onions, thinly sliced — for garnish
- 1 tsp toasted sesame seeds — for garnish
Instructions
- Heat cooking oil in a wok or large skillet over medium-high heat.
- Add minced garlic and stir-fry for 10 seconds.
- Add bacon pieces and cook until half-done, stirring continuously.
- Add chopped kimchi to the pan and stir-fry until about 80% cooked and slightly caramelized, about 3–4 minutes.
- Reduce heat to medium-low. Add the rice and pour in the kimchi juice and soy sauce. Mix everything thoroughly, breaking up any clumps.
- Stir in sesame oil and mix well. Remove from heat.
- Plate the fried rice and top each serving with a sunny-side-up egg. Garnish with sesame seeds and sliced scallions.
Notes
- Day-old rice works best — freshly cooked rice tends to be too moist and can turn mushy. If using fresh rice, spread it on a baking sheet and refrigerate for 30 minutes before cooking.
- For a vegetarian version, skip the bacon and use vegan kimchi (most commercial kimchi contains fish sauce).
- Add gochujang for extra spice, or omit it entirely for a milder dish.
- Well-fermented, aged kimchi produces the deepest, most complex flavor.
Bon appétit! Did you try making this?
Drop a comment below and let us know how it went!